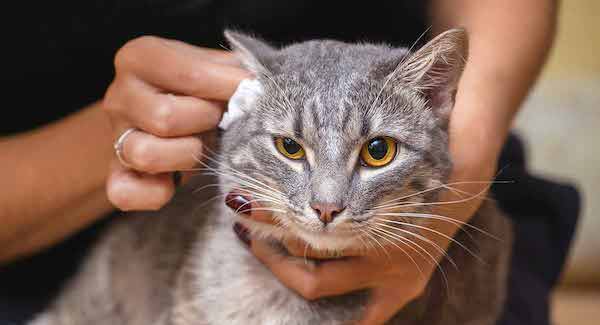
A cat’s dirty ear should be cleaned thoroughly by the vet doctor with a topical ear cleansing solution.
If you could not take the cat to the veterinary hospital more often, then you can clean your cat’s ears at home too. Veterinarians can guide you well about the cleaning methods and the products to be used for the same.
In general, cats do not need your help in cleaning them. As you must have observed, they keep themselves very tidy by self-grooming frequently. But those cats who have suffered from an ear health problem like blood blisters, mites or infection, need to be checked and cleaned regularly.
How to Clean a Cat’s Ear at Home

Your vet will provide you with a topical solution for your cat, which is to be filled in the ear canal. This solution will help you remove debris, excess ear wax or mites. Mites require extra medical treatment which is followed by ear cleaning.
Cleaning a cat or kitten ear might require some practice if you haven’t done it earlier. Take into account the following tips to clear your cat’s ear safely.
- First of all, wrap your cat in a towel to avoid any movements or pawing.
- Gently pull her ear flap back and fill the ear canal with the cleaning solution, prescribed by your veterinarian.
- Massage the base of the ear with your fingertips for 10-15 seconds. Then let your cat shake her head to throw the solution out.
- Wrap gauze around your finger and gently clean the excess solution from your cat’s ear. It is safe to use a finger to clean the solution as your finger won’t reach far enough to cause any damage. Do not use cotton swabs inside the ear canal.
- Repeat the process for the other ear.
Note: Close your eyes and move away when you let your cat shake the solution out.
How Often Should You Clean Your Cat’s Ear
As I said, cats who have suffered from an ear problem must be taken care of, but the healthy ones should also be checked at regular intervals to prevent ear infections or mites. As veterinarians say, you must normally check your cat’s ears once a month.
You should look for any debris or wax build up inside the ears and notice if an odor is smelled. If your cat has experienced an ear inflammation then she will need a weekly cleaning after the inflammation is treated. See your vet doctor to understand, how long she needs to be cleaned after the recovery.
Natural and Homemade Ear Cleaner for Cats
Olive oil is considered a useful ear cleaner among all the best cat ear cleaners. The oil must be kept at room temperature, it shouldn’t be hot or cold. Do not put any oil drops into the cat’s ears. To clean the ears by using olive oil you must moisten a cotton ball with the oil and squeeze it. Wipe the ears with the cotton ball and gently rub inside the earflaps.
This method can be used for regular cleaning, whereas for cats with some ear health issues, we recommend you to use a solution prescribed by the vet.
Final but Important Tips for Cleaning Your Cat’s Ear
- Do not use cotton swabs inside the ear for cleaning or it might damage the eardrum and push the debris further in the ear canal. However, you may use the swabs to clean the folds on ear flaps.
- Take another person’s help to hold the cat while cleaning.
- Do not use any other oils other than olive oil as there are no scientific studies performed with those.
- Do not compare cat ears with human ears. Medications to treat humans should not be used on cats.
- Do Not use hydrogen peroxide, vinegar or alcohol to clean cat ears. Use a mild ear cleaner specially meant for cats.
- Do not use your dog’s ear cleaner on your cat. Cats are sensitive and they might get reacted to medications used on dogs.
- If you aren’t sure that you can handle your cat and do the cleaning properly, better visit the veterinary hospital and get safer cleaning done.
You can support CatLovesBest with your views and comments:)

